
The process described below corresponds to the iOS mobile app. The process is quite similar with the Android app, only simpler as you won’t have to navigate between the Wi-Fi settings of your smartphone and the ADI OtoSense SMS app.
After logging in:
When deploying your ADI OtoSense SMS devices it is recommended to use the Network Validator tool in the ADI OtoSense SMS app, or a similar network tester, to ensure adequate signal strength where you deploy your ADI OtoSense SMS devices.

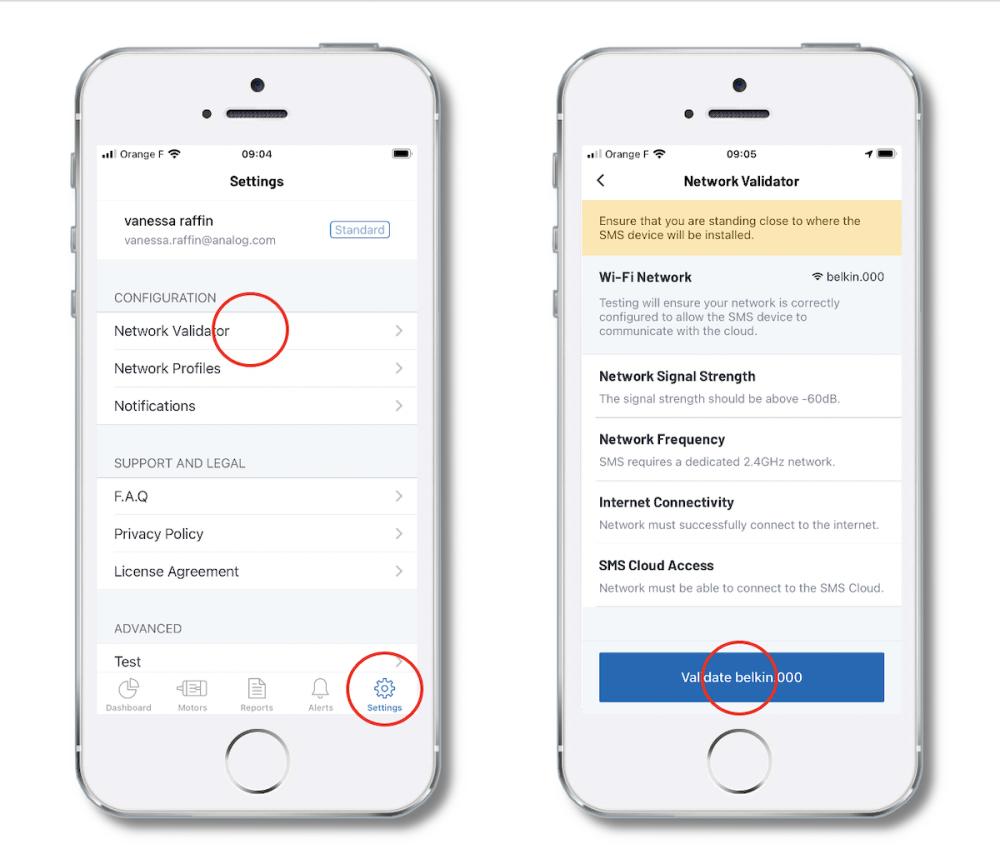
*Signal Strength indicator is only available in Android App
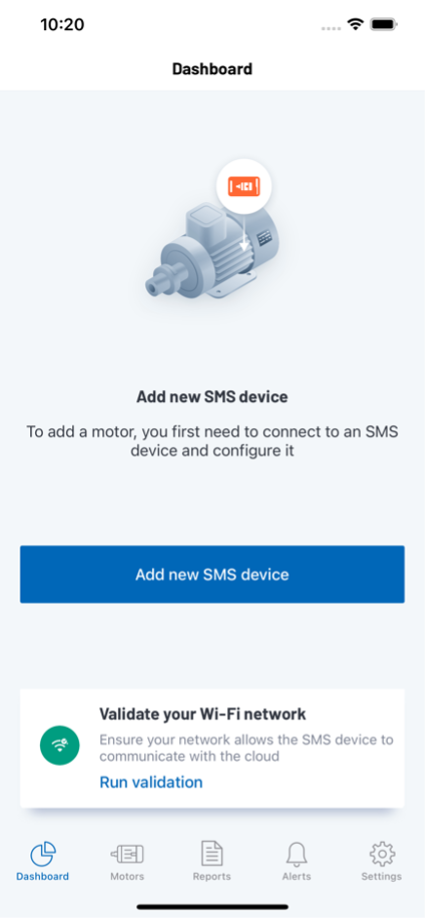
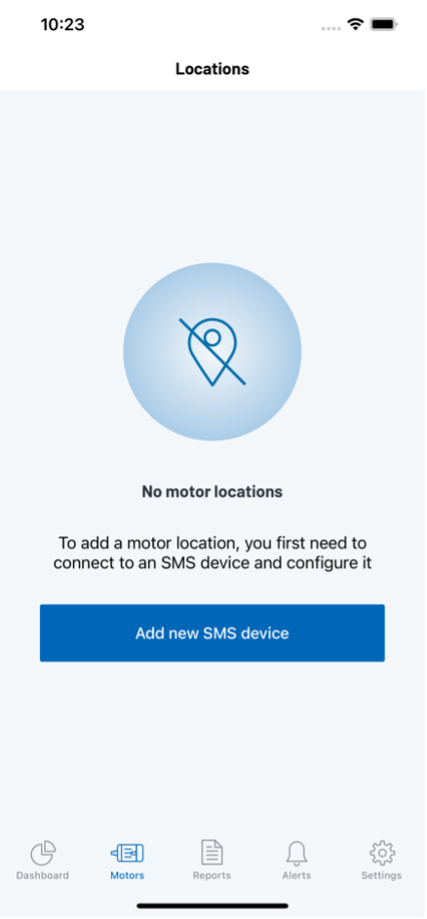
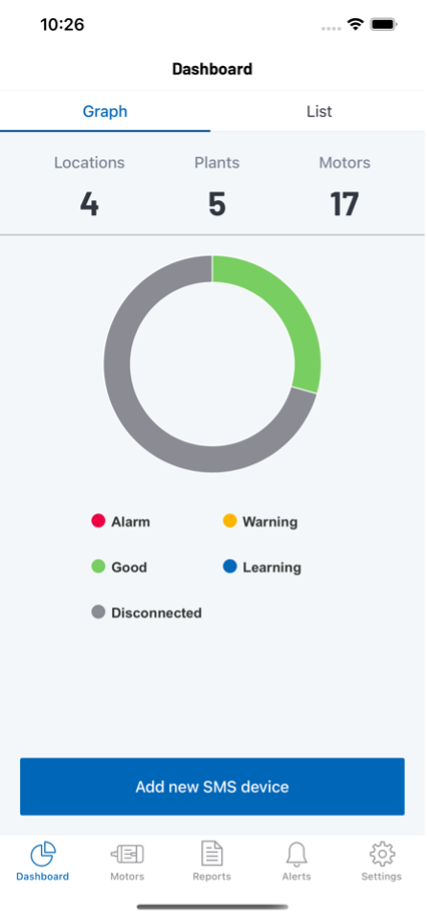
- Go to the “Dashboard” or “Motors” tab on the bottom of the screen. If this is the very first time this account is being populated, tap on “Add new SMS device” to start commissioning your SMS device.
 |
 |
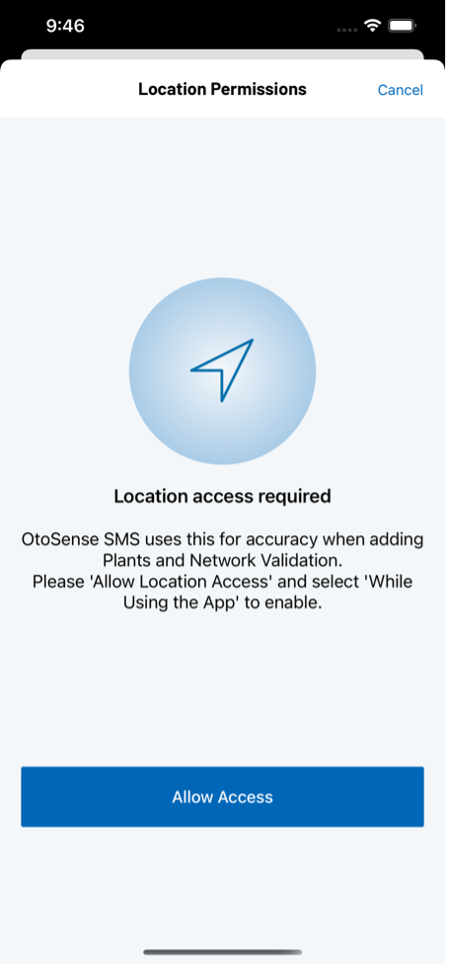
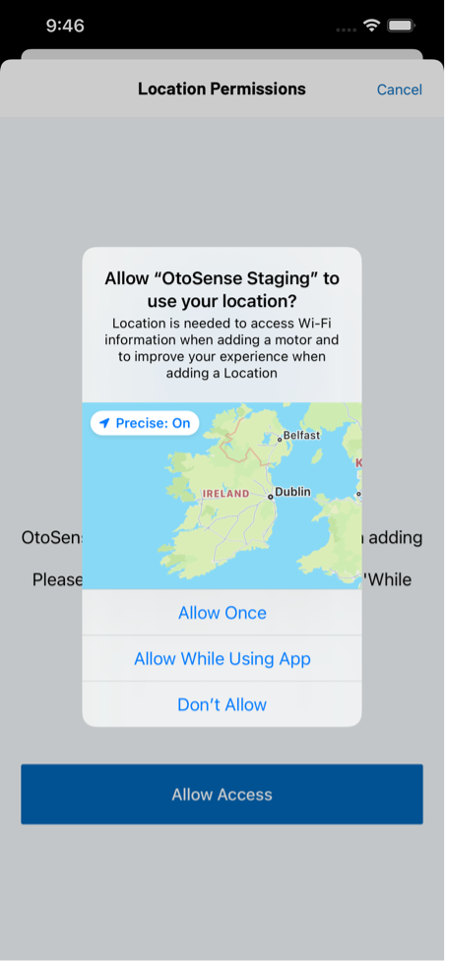
The app requires your location information in order to access Wi-Fi information. If it hasn’t already been granted you will see a Location Permissions screen. Tap the “Allow Access” button. When the pop-up appears, tap the “Allow while using app” button.
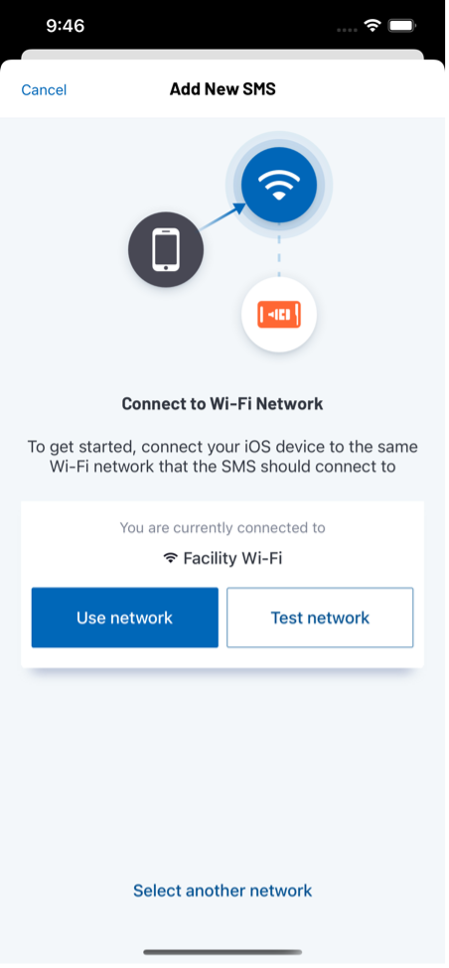
The next screen will display the current Wi-Fi network the iPhone is connected to. Take a moment to verify that this is a working network. You can also test the network at this point again. Once you are happy with this information, tap the “Use network” button.
 |
 |
 |
- Insert the batteries in the device. It will generate a Wi-Fi network with the same numbering as the device, for example: SMS00000413A.
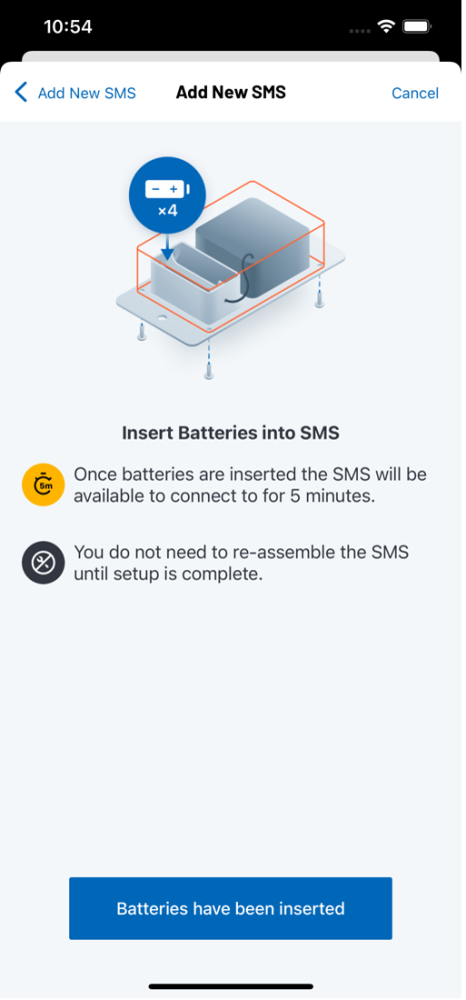 |
a. If the client’s plant connection is not enabled for any reason (client AP turned off, SSID/Wi-Fi network name or password changed, etc.) after the five minutes have elapsed, remove the batteries from the device so that you don’t drain them (after five minutes, the device will work in a more consuming mode). Make sure the plant’s Internet connection is in a working state before you re-insert the batteries and try the connection process again.
b. If for any reason you didn’t succeed in provisioning the device within the 5-minute timeframe, remove the batteries, wait for roughly 20 seconds, re-insert the batteries and start the process again.
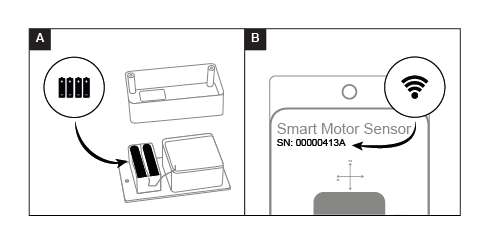
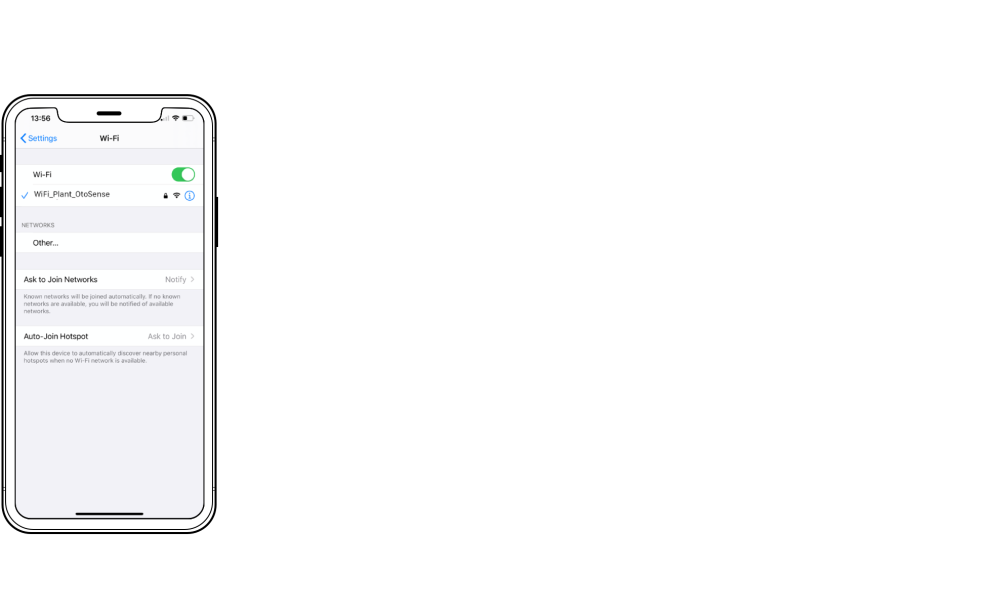
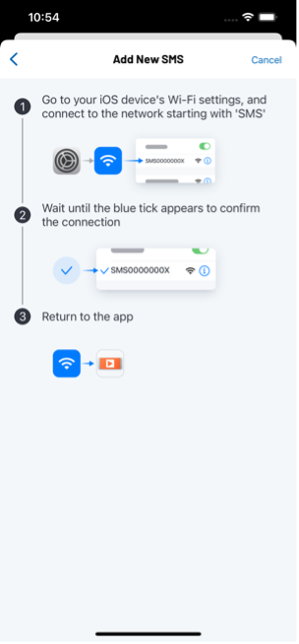
- Access your smartphone’s Wi-Fi settings and connect to the Wi-Fi network whose name starts with ‘SMS’. Wait until the blue tick appears to confirm that the connection with the SMS has been established. Then, return to the ADI OtoSense SMS app.
 |
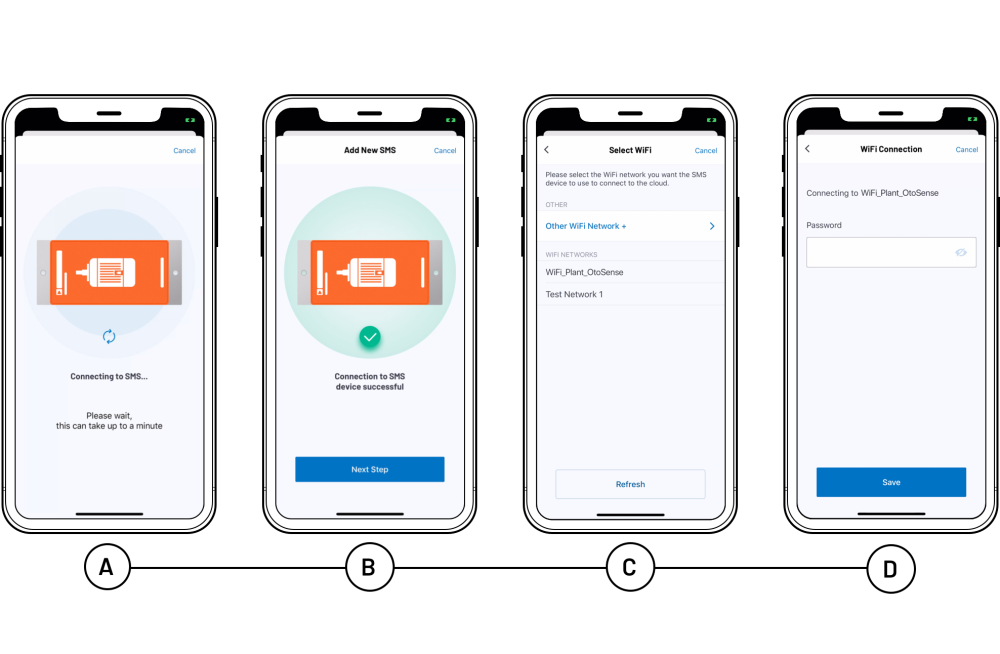
- Once connected, tap ‘Next Step.’ The list of available Wi-Fi networks will appear. Select the appropriate option, enter the password and tap Save.
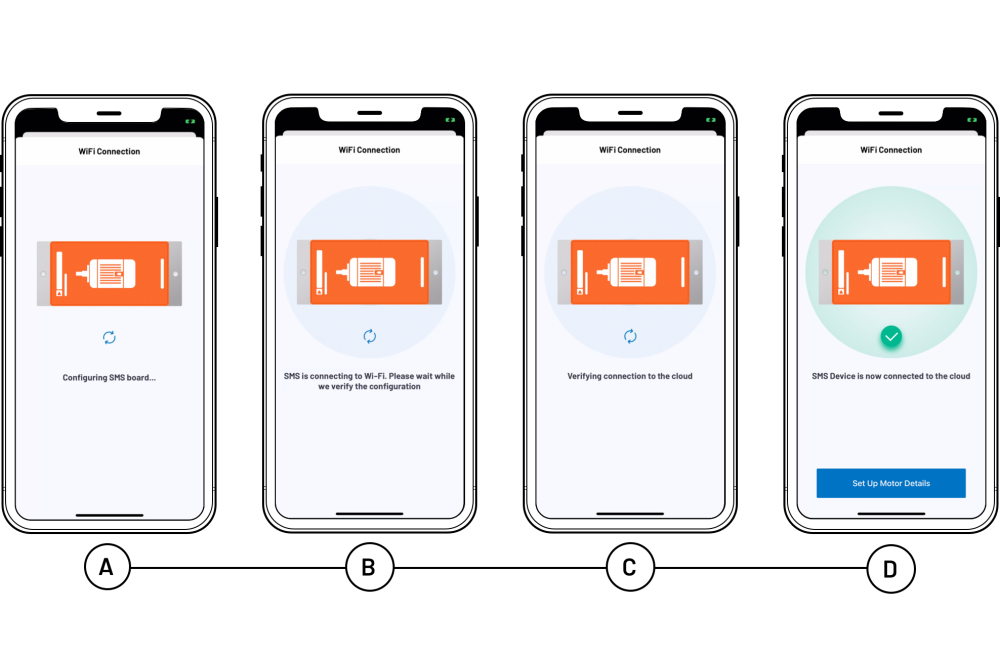
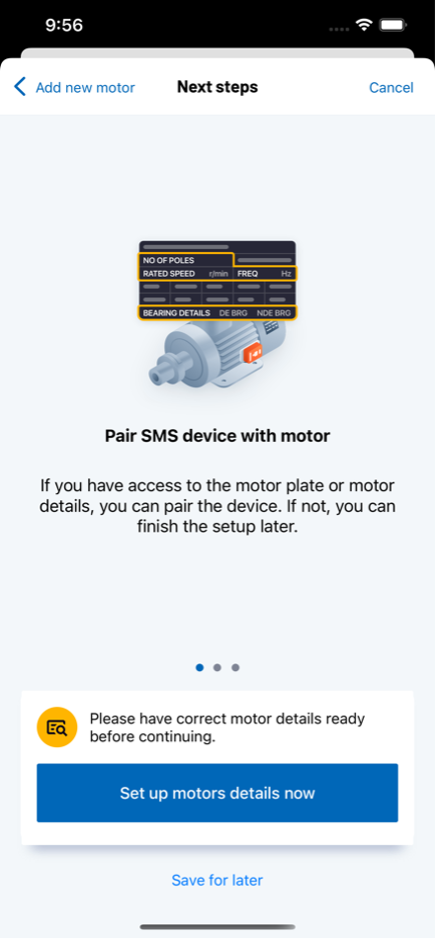
- Once SMS is connected to the cloud via Wi-Fi, tap ‘Set up Motor Details’.
![]()
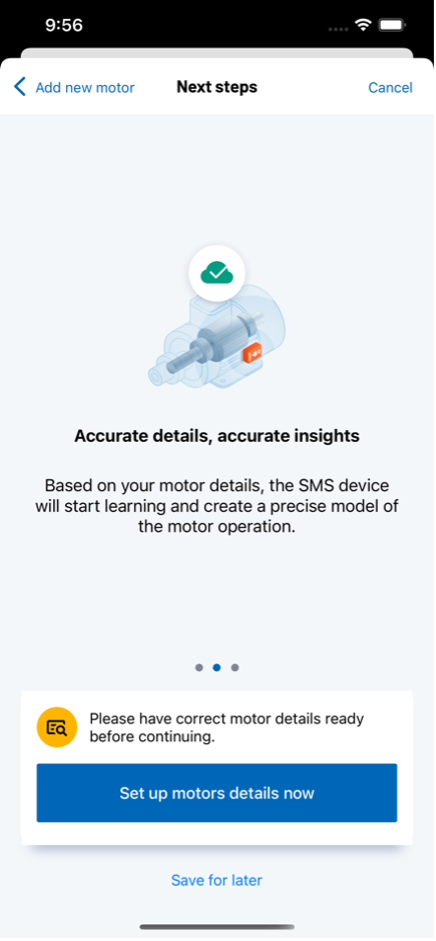
- Next you will start entering details for the motor you wish to attach the SMS device to. You can continue creating the motor at this point by tapping the “Set up motor details now” or tap the “Save for later” button to come back to this step at a later point.
 |
 |
 |
- Fill in the motor’s details. Start by adding a photo of the motor and its nameplate.
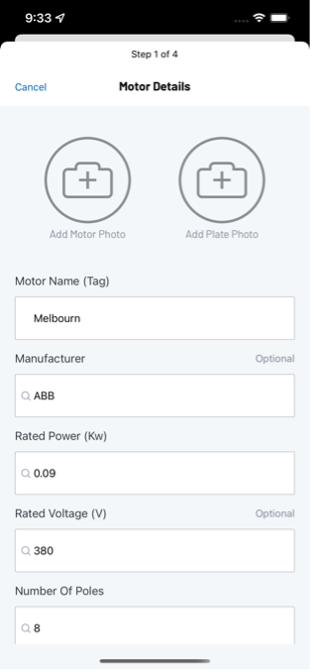 |
- Fill in the motor data
• Motor name (TAG): Identification of the motor
• Manufacturer: Enter manually if it does not appear on the list
• Rated Power (kW)
• Rated Voltage (V)
• Number of Poles
• Frequency (Hz)
• Connection
• Drive
• Efficiency level
• Model
If the Bearing diagnostic is important to you:
- Enter the Motor Bearing Model Part Number, which is typically a four digit Industry Standard Number for LV, for example: 6321 (do not enter a single digit).
- If you don’t have the Bearing Manufacturer information, leave this field blank and don’t enter the motor manufacturer
- If you don’t have the Bearing Part number, leave this field blank (do not type in a word, e.g. UNKNOWN or MISSING)
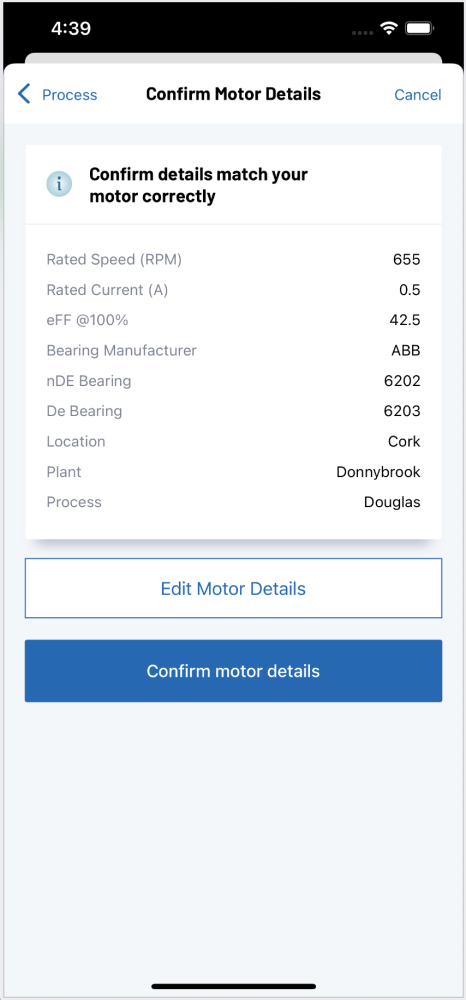
A list with all the motor data is displayed. Confirm or edit as required.
To help you fill this information and see the correspondance between IEC frames and NEMA frames, check the section How to read a motor plate.
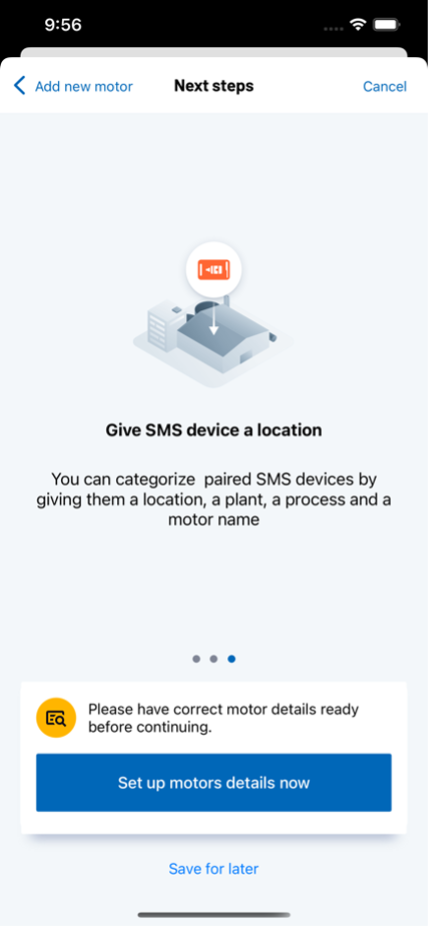
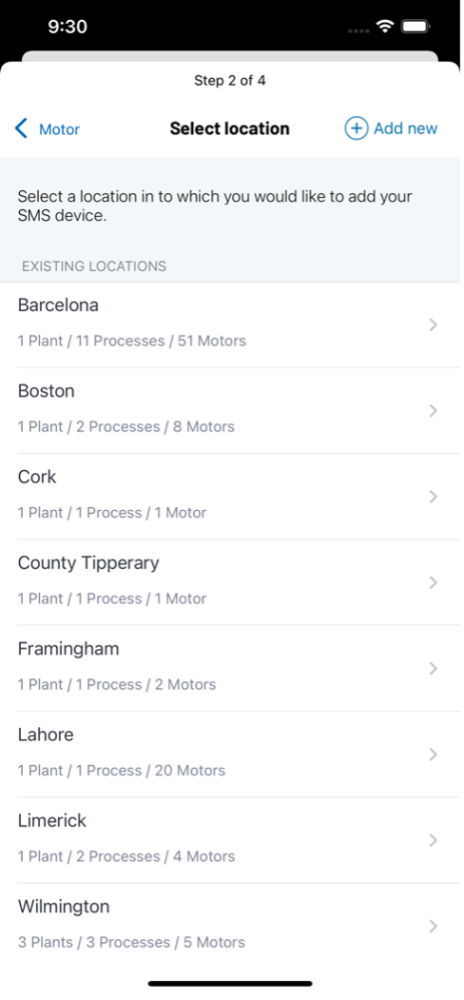
- You will now be prompted to add several tags to the Motor Details; Location, Plant and Process.
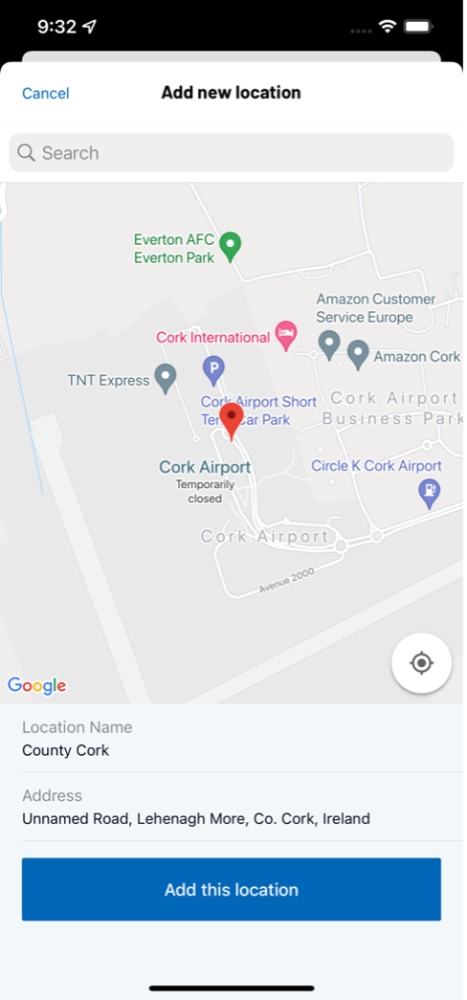
You can select a Location that has previously been added. If it’s the first time you have added a motor and there are no existing Locations, you will be prompted with a screen to select a Location. Subsequently, if you wish to add a new Location that doesn’t already exist, tap on the “Add New” button in the top right of the screen to access this Add new location screen.
 |
 |
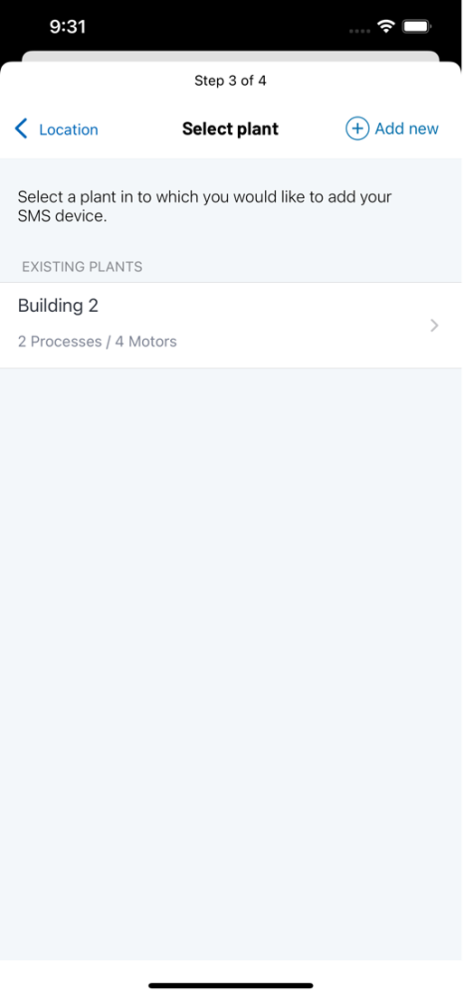
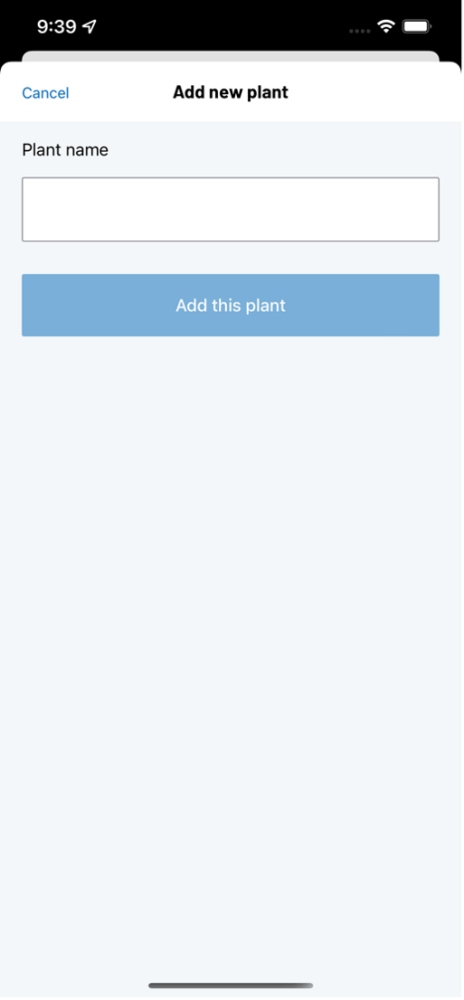
You can select a Plant that has previously been added. If it’s the first time you have added a motor and there are no existing Plants, you will be prompted with a screen to select a Plant. Subsequently, if you wish to add a new Plant that doesn’t already exist, tap on the “Add New” button in the top right of the screen to access this Add new plant screen.
 |
 |
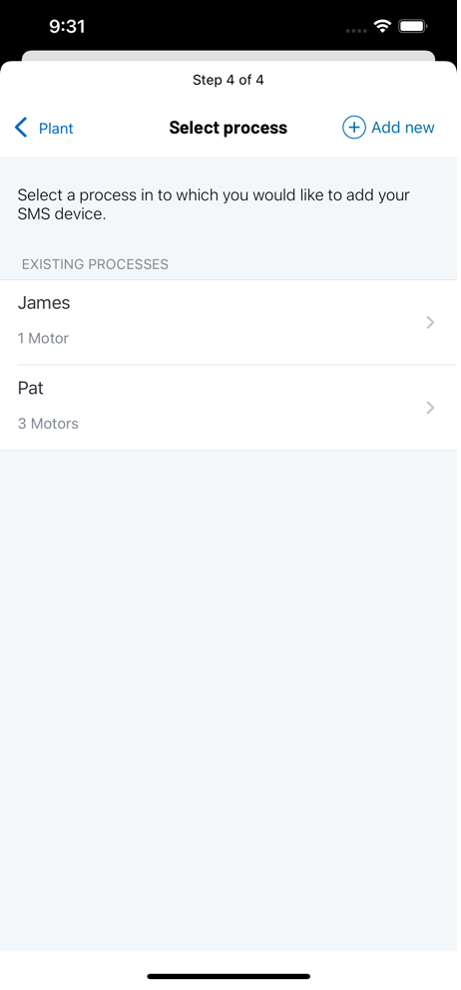
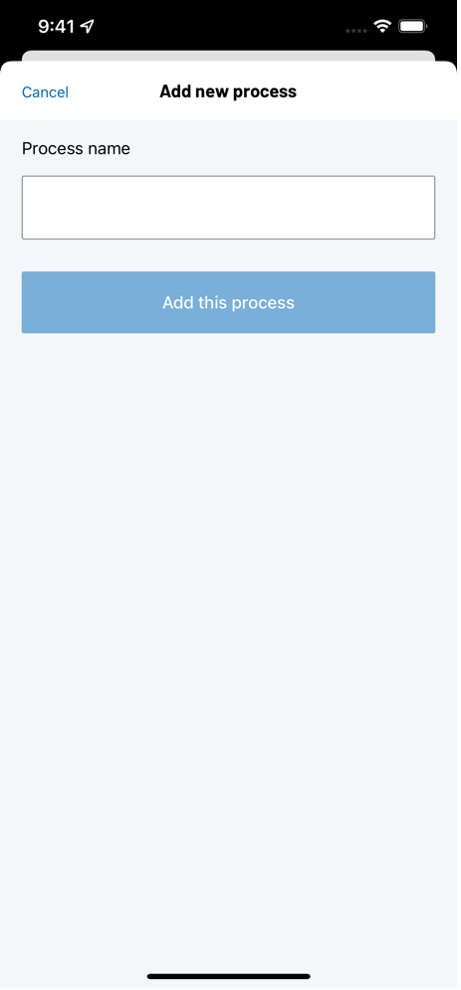
You can select a Process that has previously been added. If it’s the first time you have added a motor and there are no existing Processes, you will be prompted with a screen to select a Process. Subsequently, if you wish to add a new Process that doesn’t already exist, tap on the “Add New” button in the top right of the screen to access this Add new process screen.
 |
 |
Once you are happy with all details you will be presented with a screen that list subsequent motor details. If you are happy to proceed tap the “Confirm motor details” button. If for any reason the details presented are incorrect then tap the “Edit motor details” button.
 |
- Adding another motor
Once you have added your first motor the app will update the Dashboard and Motors tabs.
To add a new Motor you can tap the “Add new SMS device” from the Dashboard tab or tap the “Add Motor” button in the top right of the navigation on the Motors tab.
 |
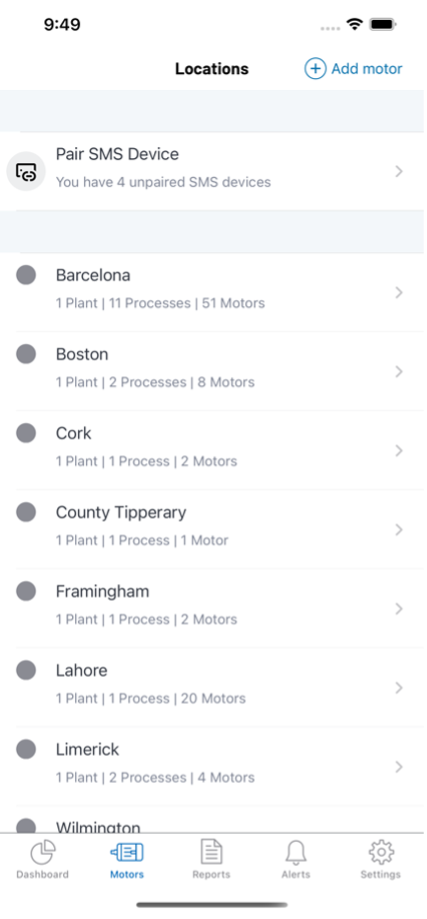 |
If you have previously commissioned an SMS device but haven’t entered in the Motors details you will see a “Pair SMS Device” section in the Motors tab at the top of the screen.
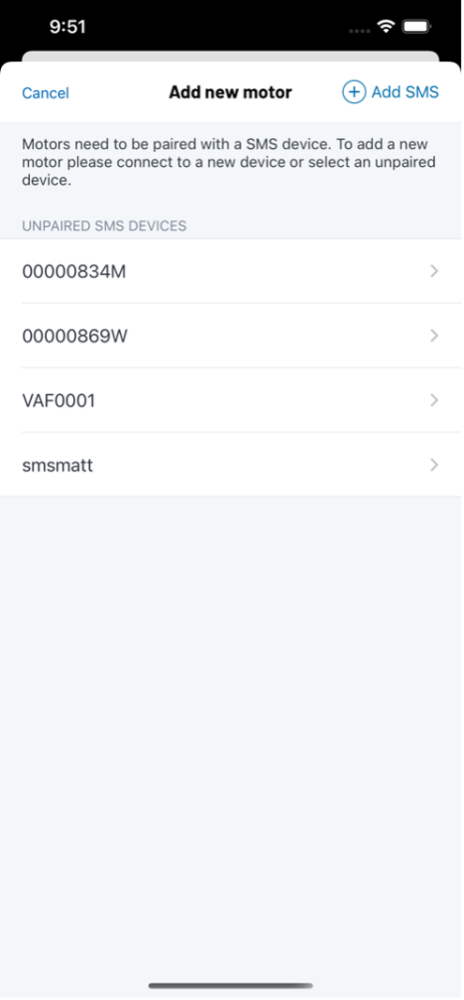
Tapping Add new SMS device from the Dashboard tab or the Pair SMS Device from the Motors tab will bring you to an Unpaired SMS Devices screen.
Here you will find a list of unpaired SMS devices that have no motor associated with them. If you wish to add a motor from here, tap one of the unpaired devices in the list. This will start the motor creation process covered above.
 |